The PR Process
Creating a PR is a process of several stages, completed by different people or identities. The first part is completed by a PR creator, who can be pretty much anyone, including a customer. Let's take a look at the PR form and go through the steps that the creator needs to perform.
Creating a PR
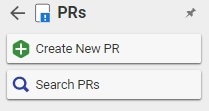
- From the Navigation panel, select Change Management -> PRs. The following menu appears:

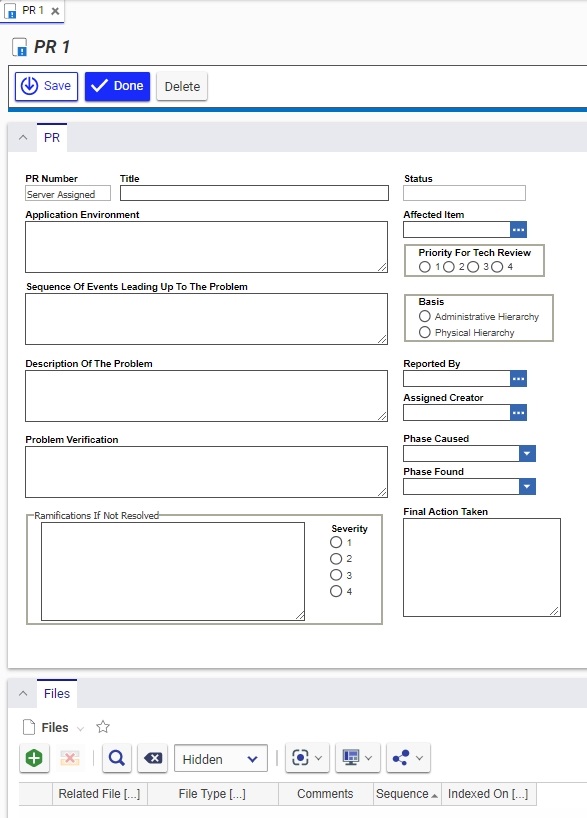
- Click Create New PR. A blank PR form appears.

- Enter values for the following properties:
- PR Number - automatically generated, assures uniqueness
- Title - the title of the PR, should be as descriptive as possible
- Application Environment - the background information about the product or the surroundings as they affect the product at the time of the problem occurrence; for example, for a software product, it could be the version or the server used; for a mechanical part it could be the temperature and the humidity level.
- Sequence of Events Leading Up To The Problem - the exact steps taken that led to the problem
- Description of the Problem - the problem description
- Status - read only field. The status refers to the life cycle state of the PR, and the life cycle is in turn controlled by the workflow. So, as the PR goes through different workflow activities, it's state is updated automatically.
- Affected Item - every PR is filed against a part or a document or both. Specify the part or document here.
- Basis - there are two choices for the basis of the problem: administrative hierarchy and physical hierarchy.
- Physical hierarchy refers to the part itself and any document associated with it. A bug in a piece of software would be classified as a physical hierarchy.
- Administrative hierarchy refers to anything that is connected with the process of running the business. An error in an expense report procedure would be classified as an administrative hierarchy.
- Click
 to Save, Unclaim, and Close the PR.
At this point the PR Creator is finished. Quite often the PR Creator would not be able to complete all the necessary fields from above, because they may simply not know the answer. That is why the next step of the process is completed by CSI, who is responsible for reviewing, verifying, and completing all information entered by the PR Creator. On save and close the PR enters the Review PR lifecycle activity, and is sent to the In Basket of the CSI. The CSI then verifies that all the information necessary so far is present, and that it is correct.
Reviewing a PR
- The CSI can now either proceed with the review process, or reject the PR. If the CSI chooses to continue the review, then values are required for the following properties:
- Priority for Tech Review - the lower the number the higher the priority.
- Reported By - select an identity that reported the problem, could be the creator of the PR.
- Assigned Creator - assign an identity to be responsible for investigating the problem (usually an engineer or a technical liaison). The Assigned Creator will have to verify the problem and provide detailed information about its origin and possible corrective actions. Assigned Creator is most commonly referred to as the Owner.
- Click
 to Save, Unclaim, and Close the PR.
 - Update the activity and vote to Verify.
This completes the Review PR activity, and the PR now goes to the Owner's In Basket, who is responsible for the Verify PR activity in the workflow cycle. (Reminder! The Owner is specified by the Assigned Creator property in the PR form).
Verifying a PR
- The Owner has the option of immediately voting Not Verified. However, if he does not, then he is responsible for the following properties:
- Problem Verification - the steps taken to verify the problem, and any special conditions or descriptions of the problem itself.
- Ramifications If Not Resolved - an assessment of what would happen if this problem is not remedied.
- Severity - the severity of the ramifications, with the lowest number being the highest severity.
- Phase Caused - the product development phase in which the problem was caused.
- Phase Found - the product development phase in which the problem was found.
- Click
 to Save, Unclaim, and Close the PR.
 - Update the activity of the PR, and vote Verified, or Not Verified.
This completes the Verify PR activity. If the Owner voted Verified, then the PR is sent back to the CSI's In Basket, and enters the Approve PR activity.
Approving a PR
- The CSI should now check that all necessary information is present. He may also attach auxiliary files if any exist.
- Save, Unlock, and Close the PR.
- Update the Activity and vote Approved.
This completes the PR process. The CSI will still have control over all the PRs that are in the system, no matter what their final state may be. For example, several PRs may be pending until they are all incorporated into one ECR. Therefore, when the final action does take place, the CSI needs to update the Final Action field with this information as well.