Class Structure
Each ItemType can contain a class structure that contains many levels of subclasses. Each subclass can have its own class specific properties and forms. Each subclass inherits its parents class properties, and also may have its own. For these examples, we will be working with an ItemType called Geometric Shape. Let's first examine how to create a class structure.
Creating a class structure:
- In the Navigation pane, select Administration>ItemTypes. Open an ItemType and click the Class Structure button to bring up the Class Structure dialog:
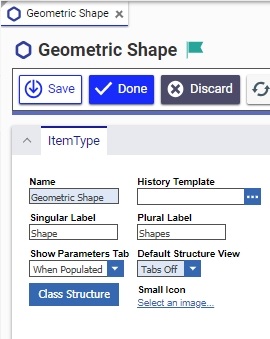
Note: Notice that the parent class, the one defined in the ItemType is automatically displayed in the dialog. Right-clicking on any item in the dialog brings up a pop-up menu, enabling the user to add subclasses.
- Right-click on the Geometric Shape Item to access the context menu.
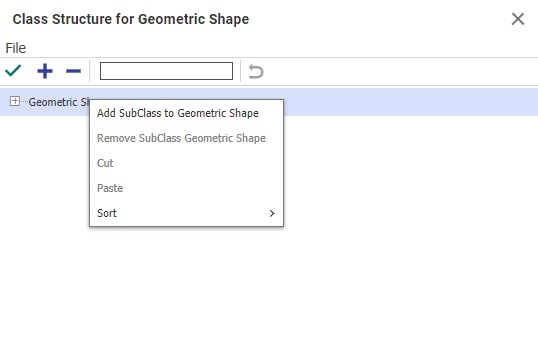
- Select Add Subclass to Geometric Shape. An empty field appears. Add color to the Class structure.

- Click the green check
 to save the class structure.
Now that we have a class structure, we can define class specific properties. Remember, each subclass inherits all the properties of all its parent classes. For example, all we need to define a square is the length of one side. However, to define a rectangle you need the lengths of two sides. The rectangle will already inherit one property of a side length, so all you need to define for the rectangle is another side. Let's look at how to define properties and how they are inherited.
Creating class specific properties:
- On the ItemType form, select the Properties tab, and click the Search button
 for all not Hidden properties (put a 0 in the Hidden search column).
 - Click the New Property button
 on the Properties tab to add the following properties, paying special attention to the Class Path column. When you click inside the Class Path column cell, a dialog box containing the class structure appears. Select the class to which the property belongs and click the green checkmark
  :
:
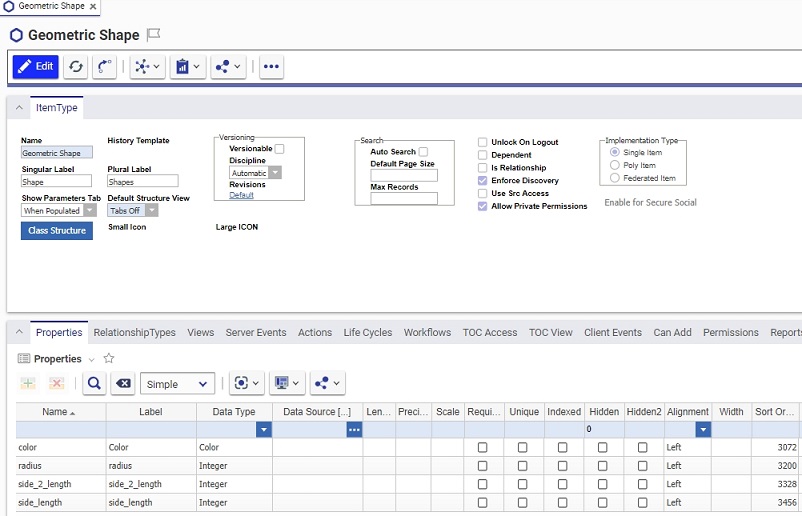
- Color - add to the GeometricShape parent class
- Radius- add to the Circle subclass
- Side Length- add to the Square subclass
- Side 2 Length - add to the Rectangle subclass
Make sure you have the TOC Access, Permissions, and Can Add set as desired. (see Permissions)
- Click Save and Done to save and unclaim the ItemType.
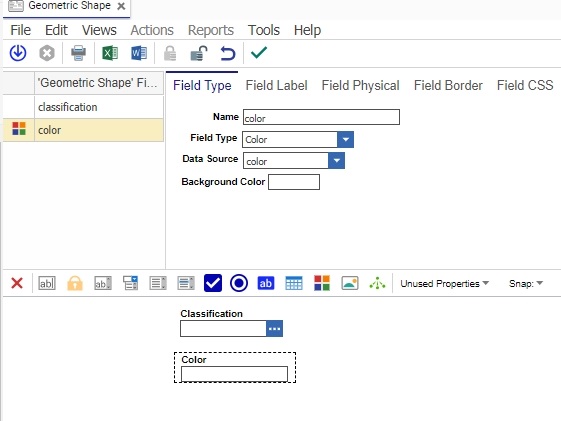
- In the Navigation pane, select Administration --> Forms. Click the Search Forms button to search for the GeometricShape form.
- Click the Lock Item icon
 to claim the form for editing.
 - Place Classification and Color on the form, like this:
- Click
 and
and  to save the form.
 - In the Navigation pane, select Administration>Forms>Search Forms. Search for the GeometricShape form, and create a new instance.
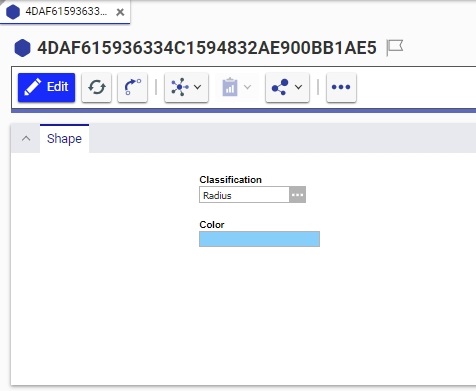
Notice that the Color property is inherited by all subclasses, because it was defined at the GeometricShape parent level.