Creating a Life Cycle Map
A Life Cycle Map can be created independently of any ItemType to which it may be attached later. As a matter of fact, many ItemTypes can use the same Life Cycle map. Additionally, an ItemType may contain multiple Life Cycle Maps which are tied to the ItemType’s Classification Hierarchy. When an item instance is created for an ItemType, Innovator chooses the appropriate LifeCycle Map based on the initial classification of the Item. When an item instance is updated, Innovator checks for any changes in the classification property. If the item’s class has changed to an allowed class that has a different Life Cycle Map and the item’s current Life Cycle state is still in the ‘Start State’, then Innovator will set the Item’s Life Cycle to the one specified for the new Classification. If the Classification is changed for an existing Item Instance which has a Life Cycle that is not in the ‘Start State’, then Innovator will reject the Classification change to avoid interfering with the normal progression of the Life Cycle. If required, the Life Cycle Map can be modeled to allow for promotions back to the Start State so that normal users can perform a class change.
To create a Life Cycle Map:
- In the Navigation pane, select Administration>LifeCycle Maps. The following menu appears:

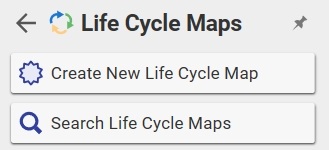
- Click Create New Life Cycle Map. A blank LifeCycle Map appears:
![]()
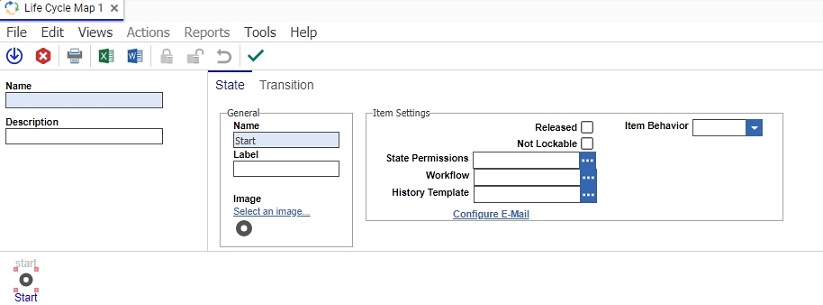
- Fill in the Life Cycle Map properties:
- Name - the name of the map
- Description- the description of the map
- Create a new State by right-clicking anywhere on the map canvas and selecting Add State from the popup menu. A new State is created, and remains selected by default. Each life cycle state has the following properties:
State Property
|
State Property |
Definition |
|
Name |
The name of the state |
|
Image |
Click the Select an image link to access the Image Browser dialog. Select an icon for the state, then click the Return Selected button |
|
Released |
This property applies only if this Life Cycle map is associated with an ItemType that is versionable. A Boolean to indicate that the status of this state is Released . Items in a state with a Released status are moved back to the Start state upon the next "Lock/Unlock/Edit" sequence, and the Major Rev property is incremented. Only one state per Life Cycle can be marked as Released. |
|
Not Lockable |
A Boolean; when set to true, the item in this state cannot be edited. Typically this property is set to true when the status of the state is Released. In order to edit the item, it has to be promoted to a new state, which would typically (depending on the life cycle) create a new version. |
|
Item Behavior |
Applicable only if the item going through this life cycle state contains one or more relationships with versionable items. There are four types of Item Behavior, and they are described below. Be aware that the Behavior set by the RelationshipType influences the Behavior set by the state as well. To see a full explanation of how these behaviors interact together, see Item Behavior.
|
|
State Permissions |
A set of permissions may be defined for each state, which will govern the access to the item while it is in this state (see Permissions). The state permissions override any other permissions set on the Item. Promoting to a state changes the Item permissions to match the state permissions. If no state permissions are set, then the Item permissions are not changed. For an example of state permissions, look at the default Part Life Cycle map. While a Part is in the Preliminary state All Employees can get and update it. However, once the Part enters the Review state, only members of the Aras PLM and the Administrators identities can update it. |
|
Configure E-Mail |
Click on this link to configure e-mail, in order to notify specified identities that the item has entered this state. See Configuring Email. |
|
Workflow |
Click the |
|
Label |
This field defines the label that is displayed within the system for this Life Cycle State. If Innovator is configured for Multilingual support, then this field allows the label to be defined in multiple languages. In order to set a multilingual value for this field, click the |
|
History Template |
Click the |
 to complete your selection.
 button to the right of the Workflow field. Select an allowed Workflow from the pop-up search dialog. The selected Workflow will be initiated when the Life Cycle State is activated. Note: An allowed Workflow is one that is related to the same ItemType to which the Life Cycle is also related.
 button to the right of the Label field. The system will pop-up a dialog for inputting a value in different languages. Refer to the help topics on
  button to the right of the History Template field. Select a History Template from the pop-up search dialog. See the help topic on
 Creating a Transition
- Right click on the state from which you wish to create a transition.
- Select from the popup menu. A transition is created from the specified state and connected to the mouse. Drag the mouse to the state which you want to connect, and click to connect the transition.


